
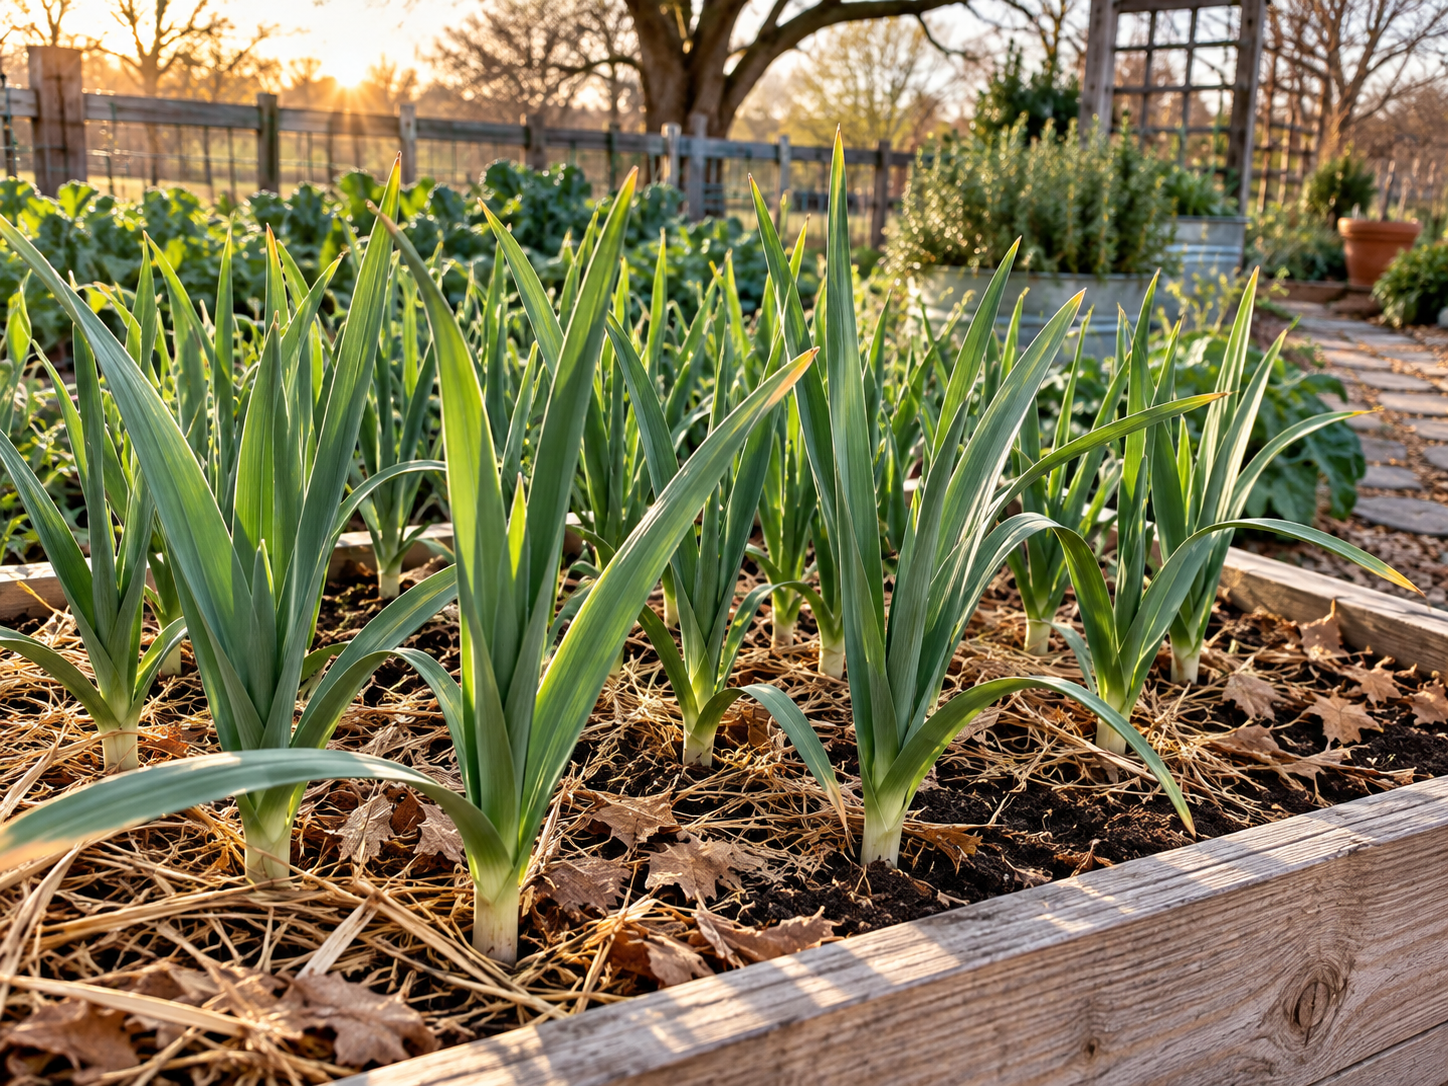
Garlic is one of the easiest crops to forget about because most of the work happens months before harvest. You plant individual cloves during the cool season, keep the bed reasonably weed-free and evenly moist, and wait for the bulbs to size up.
Use cloves, not grocery-store assumptions
Plant healthy cloves from garlic intended for planting when possible. Separate the bulb shortly before planting so individual cloves do not dry out unnecessarily.
When to plant in North Central Texas
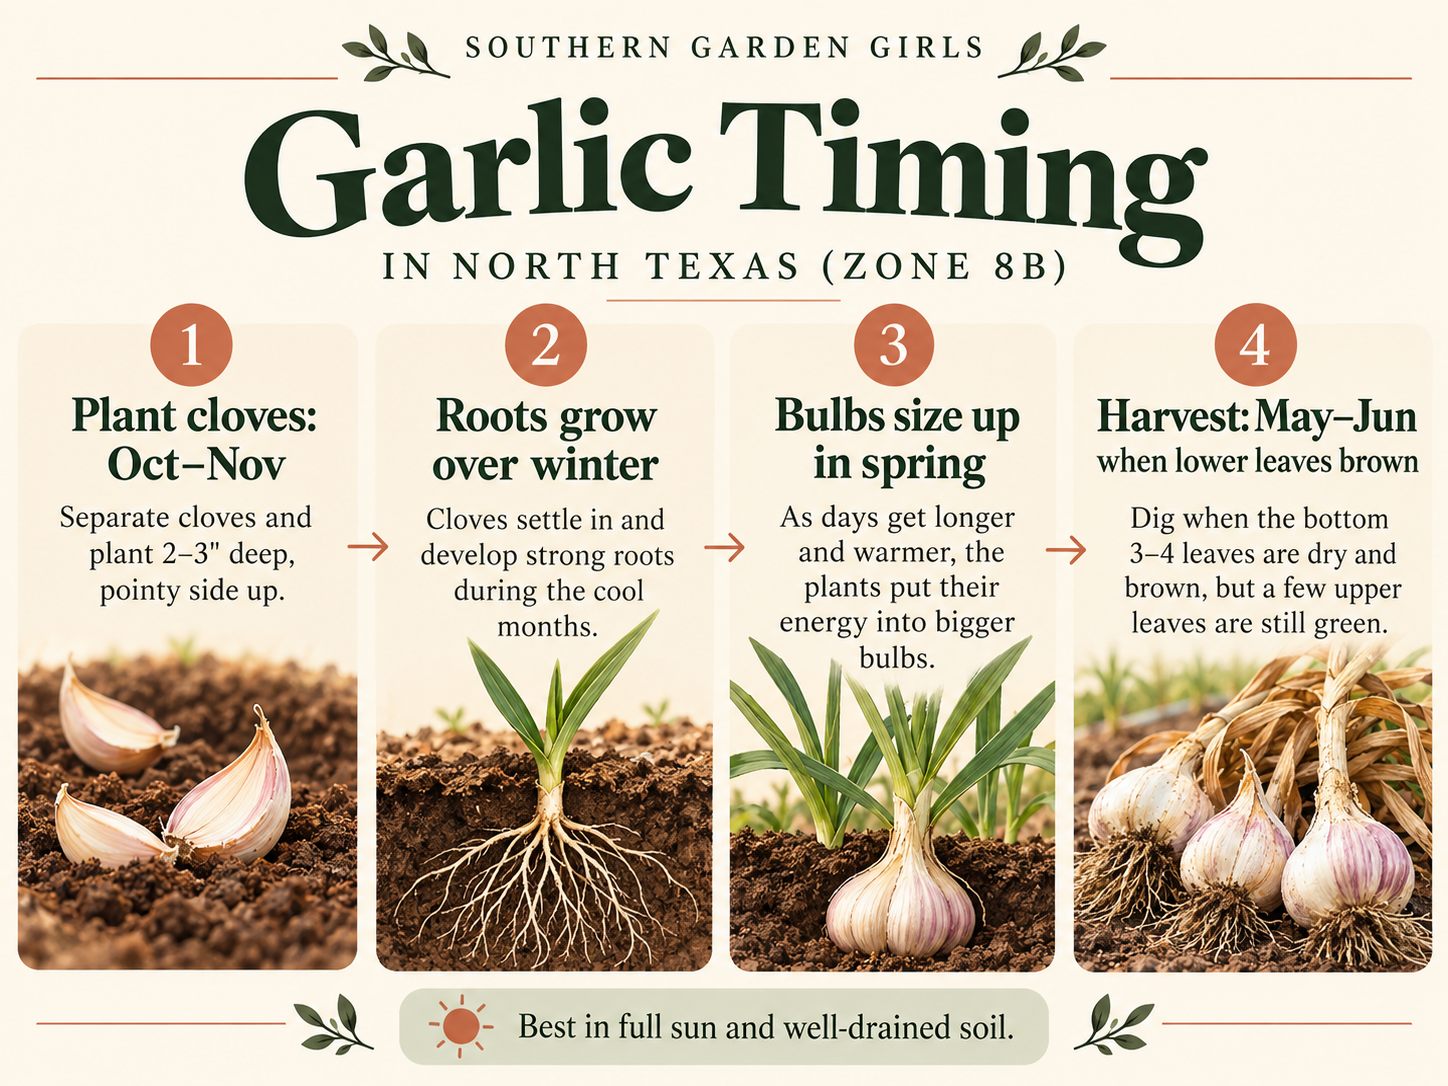
Garlic is a fall-to-winter crop here. Texas A&M’s Region III fall guide places garlic around October, which fits the cool-season pattern for North Central Texas.
Planting depth and orientation
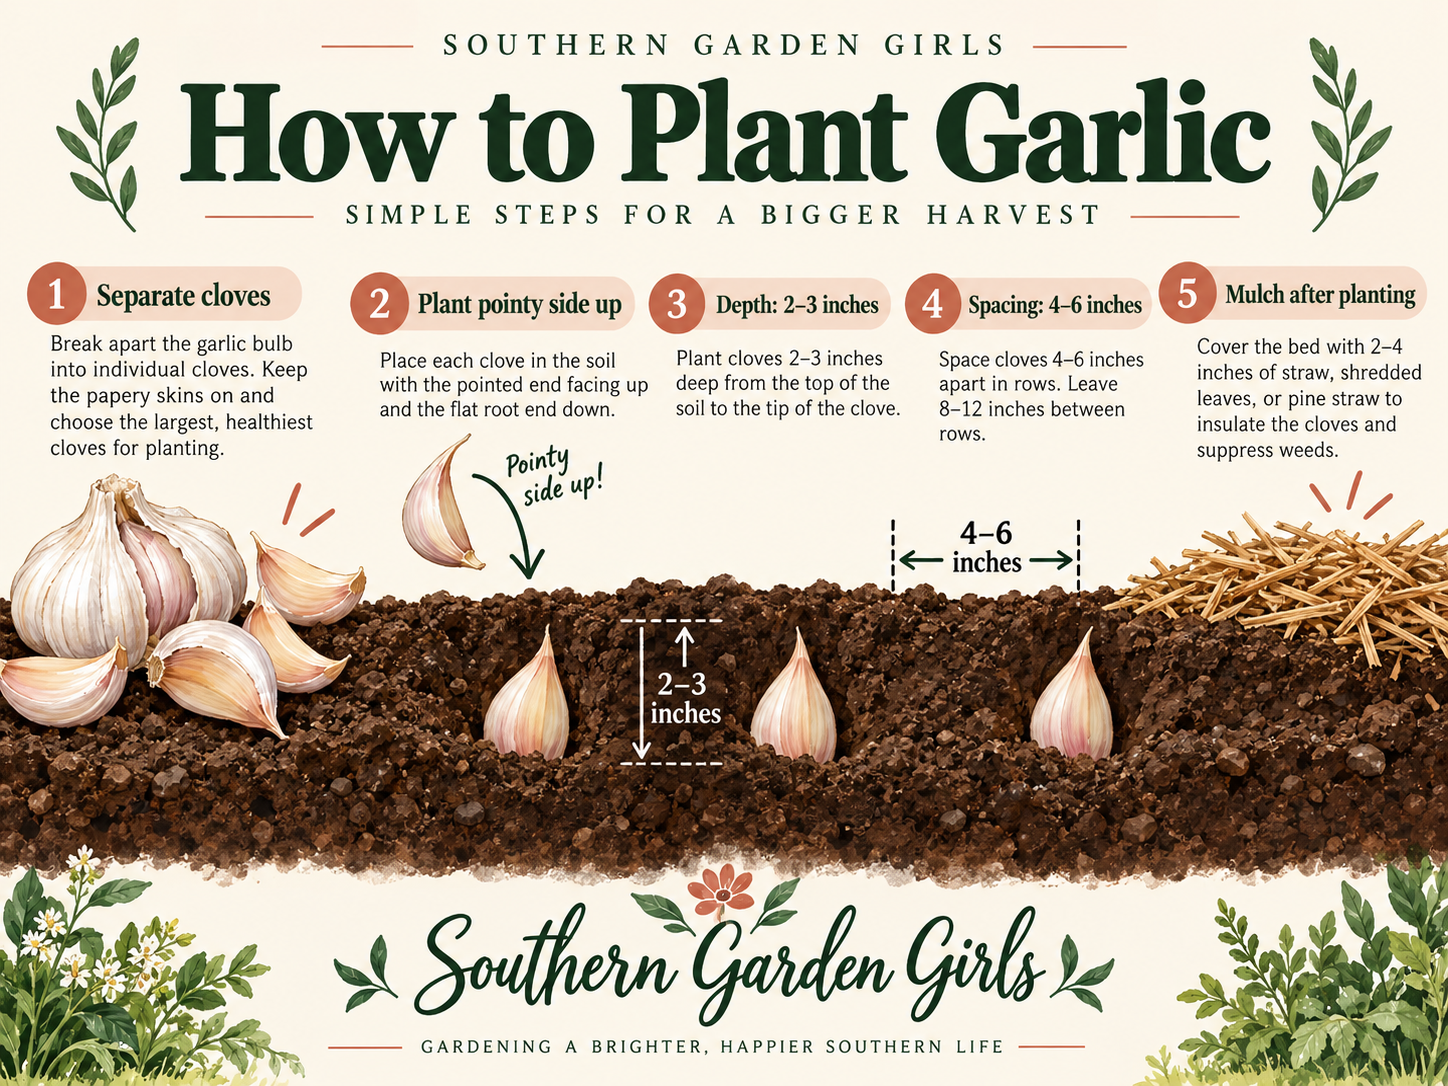
Plant each clove with the pointed end up. A practical home-garden depth is roughly 1 to 2 inches below the soil surface, with enough space between cloves for bulbs to develop.
Soil
Garlic performs best in loose, well-drained soil. Heavy, saturated soil can cause rot and make bulb development difficult. Raised beds are especially useful where native clay drains slowly.
Water and mulch
Keep moisture reasonably consistent while plants are actively growing, but do not keep the bed soggy. Mulch helps control weeds and moisture swings.
When is it ready?
Garlic usually takes many months to mature. Texas A&M lists roughly 140 to 150 days as a broad crop-maturity range, but cultivar, planting date, winter weather, and spring temperatures all affect harvest timing.
As harvest approaches, lower leaves begin to yellow and dry while several upper leaves are still green. That is a better harvest cue than relying on a calendar date alone.
Curing
After harvest, keep bulbs in a dry, shaded, well-ventilated location while the outer wrappers and necks finish drying. Do not wash bulbs and then store them wet.
Start with good planting stock
Separate garlic bulbs into individual cloves shortly before planting and choose the largest healthy cloves for the garden. Damaged, soft, or moldy cloves are more likely to rot or produce weak plants. The papery wrapper does not need to be perfectly intact, but avoid intentionally peeling every clove bare. Plant with the pointed end up so the shoot does not waste energy correcting its direction underground.
Prepare the bed for drainage, not excessive fertility
Garlic does best in loose, well-drained soil where bulbs can expand without sitting in water. In heavy clay, a raised bed or an area improved gradually with compost can be easier to manage than a low spot that stays saturated after winter rain. Garlic appreciates fertility, but overly rich conditions can produce lush tops without solving drainage or spacing problems.
What happens through winter and spring
After planting, garlic develops roots and may show green growth during mild winter weather. That is normal. Keep the bed free of heavy weed competition and maintain moderate moisture when rainfall is lacking. As days lengthen in spring, plants shift more energy into bulb development. Avoid keeping the bed constantly wet as bulbs approach maturity because persistently soggy soil can contribute to rot and poor storage quality.
Harvest and curing matter as much as planting
Garlic is usually ready when the lower leaves begin browning while several upper leaves remain green. Loosen bulbs carefully rather than pulling hard on the tops. Cure harvested garlic in a shaded, dry area with strong airflow until the outer wrappers and necks are dry. Proper curing improves storage life and gives you a much better result than washing freshly dug bulbs and putting them straight into a closed container.
Save your best bulbs only if they were truly healthy
It is tempting to replant the largest bulb from the harvest every year, and that can work well when the crop was vigorous and disease-free. Do not intentionally save cloves from bulbs that showed rot, unexplained discoloration, or poor storage quality. Replanting your best-performing healthy garlic can gradually help you identify varieties that handle your garden conditions well.
Keep the bed clearly marked
Garlic occupies the garden for months, and winter growth can become easy to overlook. Label the variety and planting date and avoid digging around the bed for unrelated projects. Knowing exactly where bulbs are developing also makes spring weeding and irrigation work much safer.